Golf Swing Basics – The Grip
Golf Basics
There is no trick here. Want better scores? Start by getting a better grip! Sometimes, a grip can look good on the outside, but still be incorrect. Let’s take a closer look at the details of how to place your hands correctly on the club.
The Left Hand

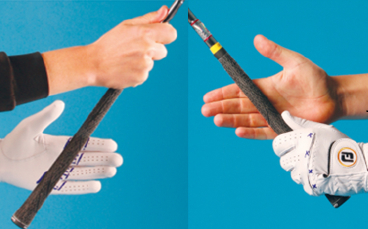
- Start by holding the club up at a 45 degree angle with your right hand on the bottom of the grip and the clubface pointing to the sky. Why? Because the club needs to be placed in the hand at 45 degrees, and this makes it a lot easier.
- Now, place the club across the hand, from the middle of the index finger to base of the baby finger. Many times, I draw a line on the glove to help students find this position.
- Next, close your fingers so that it is mainly a finger held grip, with the hand closing over the top.
- The left thumb should be placed on the top of the grip so that the V created by the index finger and thumb points to your right ear – approx. You should be able to see 2 – 3 knuckles when in your address position if you are doing this correctly.
Right Hand

- Once the left hand is complete, slide your right hand up the grip. Again, it should be placed diagonally across the hand, mainly in the fingers.
- When your right hand closes, your left thumb should rest nicely on the life line of your right hand.
- Your right index finger should create a little trigger look, separated slightly from the 3rd finger. Your right thumb should be placed on the left side of the grip. The index finger and thumb should nearly touch. The V created by the index finger and thumb should point vertically up your body or slightly right.
- Joining your hands is matter a preference. Over-lapping (perhaps for slightly bigger hands), Inter-locking (perhaps for smaller hands), or Baseball for juniors or very small hands.


